I’ve written before about replacing hook and loop tabs on my old bumGenius pocket diapers. After my son was born I quickly realized that the elastic on the legs was failing too, even on my new 4.0’s that my daughter had barely used. I was also disappointed to see that while the new 4.0 hooks were stronger, as a result the front loop strip (or landing strip as some cloth diaper mamas call it) was getting bald patches. I also had a stack of hand-me-down 3.0s from a generous friend that all needed new hook & loop and elastic as well. So I decided the time had come for a full blown diaper rehab project.
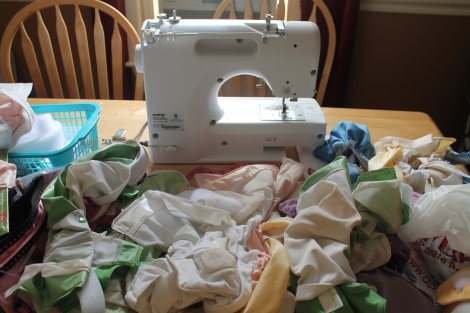
This is a picture of what my dining room table has looked like for the past few weeks (OK, months) as I have slowly worked through this project.
With the diapers I already owned (both 3.0 and 4.0) as well as the hand-me-downs, I had 28 bumGenius to repair. Just looking at that number made me want to give up. At first I decided to try and assess each diaper individually, replacing only the elements that needed replacing. But I finally decided that was just going to drive me crazy. So every diaper got new laundry tabs, hook & loop tabs, leg and back elastic and yes, (drum roll please) front loop strip. I lived in terror of ruining my diapers. Would they leak when I was done? What if I stitched them so crookedly that they were unusable and I couldn’t resell them. I reminded myself of a few things.
1. I didn’t buy more than half these diapers, so there wasn’t a large a potential financial loss.
2. The reason I was embarking on this enormous project was that they were already unusable. The hook & loop wasn’t reliable enough to stay closed and the weak elastic was allowing leaks, especially on my skinny boy.
3. Part of why we decided to do cloth diapers was to save money, and that only really works if the diapers get us through as many of our kids as possible. If I did all the repairs, there was a possibility that the diapers would make it onto future children. As they were now, they would be lucky if they followed my son to potty training without failing completely, and that was only because we used them so intermittently.
Materials needed:
-Three pieces of ¼ inch elastic approximately 4.5 inches in length
-10 inches of 1.5 inch loop for front strip
-Two 2 inch pieces of 1.5 inch loop for laundry tabs (You could also try using loop fabric, but I prefer the same loop you use for the front strip)
-Two hook tabs and two loop tabs, approximately 1.75 inches long and 1 inch high.
-100% polyester thread
-a sewing machine with a ball point needle (While some steps of this project can be done by hand, I think that doing the whole thing would be incredibly cumbersome. The only thing I can see is that maybe sewing by hand might mean not having to take the entire diaper apart to replace the front loop strip, but I still think it would take way more time and effort than using a sewing machine.)
You can use either Touchtape or Aplix, both have advantages and disadvantages. I personally chose Touchtape because it is supposed to be sturdier and last longer. I would love never to do this again. (Though I’m not sure that my diapers would survive another rehab anyway). It is a little stiffer, but I didn’t find it bothersome. My main concern was wear and tear. BumGenius diapers originally come with Aplix and I wasn’t pleased with how that held up so I thought I should try another option.
Where to get materials:
Cotton Babies sells bumGenius repair kits with 3 elastic pieces, laundry tabs and new hook and loop tabs (all aplix). But NOT a front loop strip. This is thought by many reviewers to be a major failing of the repair kit. I think this is mostly due to the fact that replacing the front loop is a big job, one which most people wouldn’t bother with and would sooner buy new diapers. (Honestly, if money were no object, I think I would have given my diapers to a more crafty frugal friend and bought new ones too, but in this case my budget won out over my fear of a large and detailed sewing project).
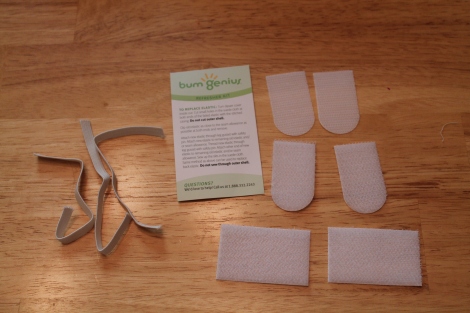 Initially I bought repair kits for several of my diapers. At $1 a piece if figured it was a worthwhile investment. But when I realized I was going to replace all of the front loop I rethought it a little.
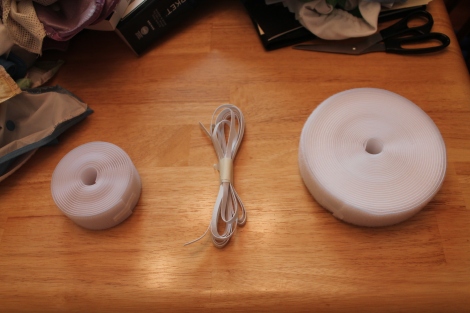
The above amount listed is enough to repair one diaper. If you are doing several, it might be more cost effective to order the materials in bulk, since you need loop from the front of the diaper anyway. I bought large roll of loop 1.5 inch Touchtape from Kids in the Garden. Their shipping was reasonable and prices the cheapest I could find. I also priced their hook and braided elastic, discovered that if I cut my own tabs and elastic I’d save quite a bit over using the bumGenius repair kit.. But if you don’t want to be bothered $1 a repair kit isn’t too bad for the convenience and the nicely rounded tabs.
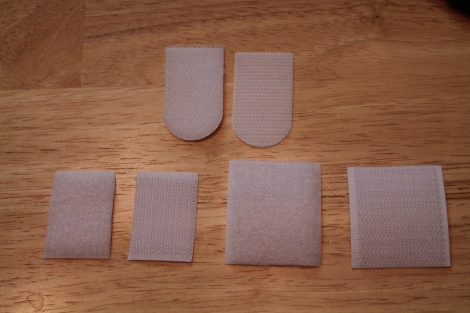
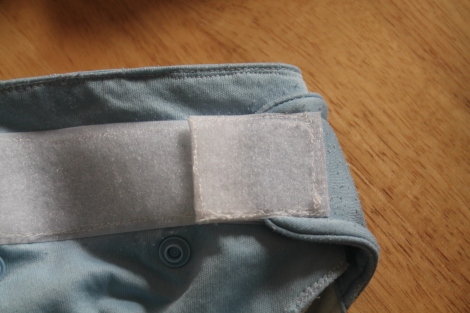
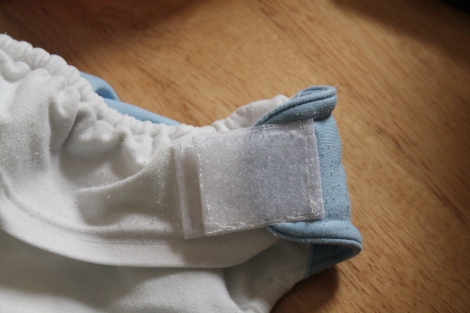
There are a couple of options when cutting your own tabs. I personally prefer to use 1.5 inch loop for the laundry tabs so that they completely cover the old ones. But cutting my own hook and loop tabs proved to be a little more complicated. I didn’t want to have to purchase more loop in the different size so I purchased 1.5 inch hook and a larger quantity of 1.5 inch loop. (You will need quite a lot more loop than hook if you are replacing the laundry tabs and front strip as well). So I had two options, make my tabs a little taller in height (1.5 inch instead of 1 inch) or a little shorter in length (1.5 inch instead of 1.75 inch).
I think I prefer the smaller tabs.
Other companies that sell Aplix and Touchtape for rehabbing or sewing your own diapers are Very Baby, Wazoodle and many others. Or you could try a local craft store or even a cloth diaper boutique. My experience as been that large chain craft stores don’t carry the quality you need.
Next time, we start the process of rehabbing our diapers and giving them a second life. Be sure to come back for Part 2.




I am in the process of replacing the front loop on my freetimes….fun. I ce across your post while googling. I replaced the laundry tabs a couple month back using the BG repair kits, now my problem is the front loop. I’d like to use touchtape for the front loop – but before ordering it I’d love to know if the BG tabs work with the touchtape or if that would mean I would have to replace the tabs with touchtape as well? Thanks in advance!
I think it should work. I have replaced all the front loop on my bumGenius 4.0’s, and some tabs I did with the bumGenius Aplix. I would normally recommend using the same kind of hook & loop for both, but if you’ve already replaced the tabs, using touchtape should be fine. I will warn you though, the bumGenius hooks are strong, they will eventually bald your front loop. (Which is exactly why I had to replace the front loop strip to begin with). Hope it works out OK. Replacing front loop is one of the most annoying and difficult tasks I’ve taken on thus far, when it comes to diaper refurbishment. Sometimes it’s easier to just to convert to snaps.
I did replace one (I just can’t remember which brand of Velcro I have!) and actually, it was much easier for the freetimes than what I’ve seen of the 4.0s. No cutting and only two areas to stitch rip! Thanks for the help. Did your touchtape go bald too? My landing strip just got so fluffy it no longer stuck. These are my fave daycare diaper so I’m hoping to maintain the Velcro…
So far none of them have gone bald since I replaced them, though the hold is not quite as strong as the bumGenius aplix after a while. Which is fine for little ones, but I don’t trust it for naps or nighttime for my toddler. He can figure out how to get it open.
Great info! I have a question for you that I have been unable to find an answer to thus far. I replaced the landing strip (and everything else) on some unusable, rough looking, hand-me-down BG’s, BUT the landing strip was too firm and sharp and ended up scratching my baby’s thighs badly. I tried trimming and rounding the corners and also tried folding the PUL up around the edges to eliminate the scratching, but it didn’t work. I haven’t been able to find out what kind of soft, flexible hook and loop BG uses, and it is impossible to figure it out online. Do you know which kind of hook and loop is comparable to the fabric-like hoop and loop that originally comes on the BG diapers? Thanks!
I understand what you mean about sharp edges. Maybe try doing a short zig zag stich around the edges? It may stick to your hooks a bit, but should help with the sharpness. The Touchtape I used doesn’t seem to hurt my kids. BG uses Aplix, which is a different kind which may be the difference you are dealing with.
Thanks for the info! I did use a zig zag stitch, but maybe going over the corners will help. Thanks again!